5 Days Hiking the W in Patagonia, Chile
- Milsner Fitness
- Mar 31, 2025
- 18 min read
Updated: Aug 25, 2025
Did hiking in Patagonia, Chile quickly jump a few spaces to the top of your bucket list? You are in the right place because I just completed the W Trek, in reverse, last month and I am here to share with you my full experience preparing, hiking, and reminiscing about this trip!
First and foremost– this trail is 100% friendly to EVERYONE and I saw people of all ages on this trail. So if you’re thinking of doing this with your partner, your parents or maybe even having a little one in an Osprey toddler pack, you’re going to love it. You don’t need me to tell you that every step of this trail was absolutely breathtaking, the pictures will speak for themselves. Though I will share that the terrain was something like I have never experienced on a single backpacking trip.
A culture shock worth mentioning– the “Patagonia W Trek” is located in Torres del Paine National Park in Chile. Many Americans, myself included, think that “hiking Patagonia” specifically means doing this trail, which is far from correct. After spending nearly 6 months living in Argentina, I learned that the Patagonia mountain range, encompassing the Andes mountains, is about 260k square miles! So as a pseudo “local” Argentine talking with true local friends about “hiking Patagonia” they would look at me as if they were still waiting for the punch line. They would ask me “yeah, where?” and I would respond, “you know, Patagonia!” And still, deer in headlights! So I encourage you to pass along this knowledge and start saying you’re going to be doing the “W Trek in Patagonia, Chile” for a more precise representation of where you’ll actually be! For the purposes of this blog, you'll hear me reference "Patagonia" several times, meaning "the W trek"!
Without giving away any more spoiler alerts just yet, let’s get into the details of my trip, how I prepared, what the hiking days looked (and felt) like, and my top recommendations for you as you get ready for your own adventure!


Gearing Up for Hiking in Patagonia
Exercise Training Plan
While I go into full details of my training plan in this blog post and provide my complete 6 week framework, I will say that training for this trail at least 4-6 weeks in advance was the best decision I made! And I am saying that as a consistent strength trainer 4-5x/week for the past 10 years and a Certified Personal Trainer! While my training plan didn’t differ too much from my regular training routine, it had specific intentions when it came to exercise selection and a greater emphasis on my cardio endurance training. Though the trail is totally doable for anyone who is already regularly active, I always recommended having a focused training plan to follow when gearing up for anything over a 2+ day hike, especially when you’re working with varying terrain and weather conditions as you will be exposed to along the trail!

Food Prep & Fueling Strategy
Arguably my favorite part of backpacking prep is the food and snack prep! If you’ve backpacked before, you may be thinking “is she crazy? How could anyone enjoy getting ready to eat oatmeal, tuna wraps & dried beef stroganoff for 4 nights in a row?” Okay, touché! The great thing about hiking this trail is that if you don’t want to prepare and carry your food, you don’t have to! This is a super luxe option for backpacking and honestly never one I even knew existed, but the tour operators here have it dialed down to a T with the iconic “refugios” along the trail! More on that to come in Part 3 of my Patagonia Backpacking Trek blog on all things how to get there and planning your ideal itinerary.
Since we opted to go the traditional backpacking route and carry our own food, I’m going to give you the full breakdown below of what we packed and how we stayed fueled for the long trekking days. I have a bit of a bias here being a Certified Nutrition Coach and geeking out over food prep is kinda my thing! [Spoiler Alert] Upon doing our W Trek research, we learned the “refugios” along the trail had a ful(ish)l service restaurant and bar, so we opted to do 2 dinners at the refugios and 2 backpacker meal dinners, over our 4 nights. I won’t say anymore about the refugios because this was one of the coolest experiences and surprises each day, so I don’t want to be the full spoiler for you! Now, let’s get to the food!
My primary objective with backing food prep (and regular at home meal prep to be honest) is protein content in the day. Second is calories, and not just any calories, nutrient dense calories with high quality carbohydrate and fat sources to sustain energy throughout your day.

Breakfast: Homemade spiced oatmeal (cinnamon, nutmeg and even some pumpkin spice if you’re feeling fancy) with a DIY mix of nuts & dried cranberries.
Snacks/Dessert: 3 different protein bars, 2 of them 10g protein and 1 of them 16g protein, all differing flavors and a DIY nut mix with dried fruit (cranberries, pineapple & apricots), and chocolate chips. We had these at our discretion throughout the day/night and did come home with leftovers, though I’d rather have more than not enough when it comes to food while hiking!
Lunch: Tuna wraps with salami slices in the middle! When backpacking in America, I will do a Chomps stick, though in Argentina/Chile the only meat sticks are salami, so that’s what we went with for this trip. The tuna was also a tricky one. I usually purchase these packets on Amazon for all our local backpacking trips, though the only tuna options we had in South America were tuna cans, making our packs a little heavier and the need to season the tuna. We brought small packs of pepper and garlic and the salami added a world of flavor! Surprisingly, we looked forward to these every day on the trail and we even snagged a bag of Doritos at one of the refugios that we crunched and sprinkled in there the last couple of days. Let me tell you, that was a game changer.
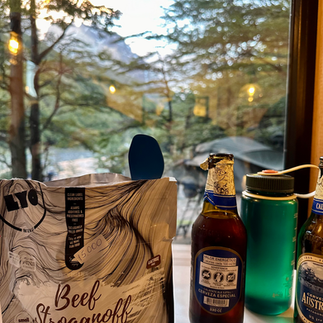
Dinner: Night 1 was a Mexican bowl, nights 2 and 3 were (bomb) pizza at the refugios and night 4 was beef stroganoff. It was nice to mix it up and be able to save on some weight without having to pack all 4 nights of backpacker meals, as these can get heavy. In Puerto Natales, the small oceanside town outside Torres del Paine National Park, we found the healthiest backpacker meals I have ever seen! Made in Poland and only whole food ingredients, simply dehydrated with no additives or preservatives. These have easily become my new favorite for their ingredients and taste!! I wish we had these in America!
If you’re coming from America, I recommend ordering these tuna packs and stocking up on Chomps sticks and protein bars to include in your luggage. The only reason we had a variety of protein bars, nuts and fried fruit was because we brought it from Buenos Aires where we were living for months prior to our trek! Do yourself a favor and snag these backpacker meals from any little store in Puerto Natales, Chile before embarking on your trek!


What’s in My Backpack: Gear Breakdown
So, as you may have gathered from this blog so far, hiking the Patagonia W (or the O for that matter), can be done truly any way you want! You can opt to backpack the traditional way as we did, where you carry everything you would need to hike, sleep & eat with you along the trail. Because of the trail’s uniqueness, you can choose to have much of this carried or done for you too, for a bit more of a luxe hiking experience vs. traditional backpacking!
As we brought all of our sleeping, eating and hiking belongings with us, I’m going to share what all was in our pack and will dive more into the alternative options and what those look like, in Part 3 of this blog series!
I will say there is a huge benefit when backpacking with another person as you both can (literally) share the load! Below I will detail out what was in my pack vs. what was in Nick’s pack and together this was more than sufficient for 2 people for 5 days.

Vanessa’s pack:
Hiking gear – pants, long sleeve, short sleeve, tank top, rain jacket, puffy jacket, warm sweater, thermal, beanie, socks (2), underwear (1 per day + 1 extra), Tevas (sandals)
Tent kit – stakes, pole, tent, cover, tarp
Cookware – bowls, utensils, Jet Boil (pot), butane
Sleeping gear – sleeping bag, pillow, headlamp
First aid – band-aids, blister care, bug spray, antiseptic wipes, medicine, toilet paper, etc.
Some food– tortillas for lunch, daily snacks, daily lunch
Water – 2 liter Camelbak and 16oz Nalgene water for electrolytes
Nick’s pack:
Food– all the food except for Vanessa’s daily snacks, daily lunch and tortillas
Hiking gear – similar to Vanessa’s pack
Some first aid– medicines, gauze, neosporin, etc.
Sleeping gear – same as in Vanessa’s pack
Water – 3 liters and 16oz Nalgene water for electrolytes
That pretty much sums it up, may have missed a few small items, though that is the bulk of it! Again, this trail is unique in the fact that you can have much of this done for you, at a premium of course! So it really just depends if you’re looking to truly backpack (carrying all your belongings) or hike (more free with a day pack only)!
Tackling the Terrain
Now let’s dive into the specifics of each day on the W trek (in reverse), what each day’s terrain, weather and obstacles brought and highlights we loved along the way! Just as there are a variety of ways for you to hike parts or all of the W and O trek, there are also an array of ways to complete the hikes either all in one fell swoop or broken up one piece at a time.
Based on (poor planning on our part) our timeline and availability on the trek, we opted to do the W trek, in reverse. The traditional path for the W trek is to start with the hardest part of the hike and the most famous viewpoint, Torres del Paine, which is the iconic 3 mountain peak Patagonia is most famous for! We opted to do that part to end off our trek and start with the heavier travel (bus + boat + hike) on Day 1. Here’s the path we took and the refugios/campsites where we stayed, then in the next segment we’ll get into the specifics for each day:
Day 1: Glacier & Refugio Gray
Day 2: Refugio Paine Grande
Day 3: Campsite Frances
Day 4: Refugio Chileno
Day 5: Torres del Paine Monument & hike out to park entrance

Day 1: Puerto Natales to Glacier Gray
Start Time & Distance: Early morning 4:30am wake up call to make breakfast and do the last minute pack up to catch our 7am bus from Puerto Natales bus station to Torres del Paine National Park entrance and then to the boat dock, within the park at Lake Pehoé (total bus trip of about 3 hours).
Then we took a 30 min boat ride along Lake Pehoé to Refugio Paine Grande where we stopped for lunch, restrooms and of course some pictures at one of the most beautiful lakes in the world!
After lunch, we started our 7 mile hike around 12pm to Glacier Gray– an incredible glacier wall and ocean of ice!
Terrain & Weather: This was our first day, so legs were fresh and ready to go! Terrain was relatively typical for hiking, lots of firm dirt and solid rock, nothing out of the ordinary today and the path itself was so well done, never feeling like you were going uphill or downhill for too long at a time. Lots of exposed areas starting the initial climb to Glacier Gray and the left hand side of the W, so the wind was intense at times (but more so for us on day 2 coming back). The weather was clear skies and super enjoyable for us; this was by far the easiest day of the trail and had beautiful views of the lake and glacier as you got closer!
Refugio/Camp Recap: First night camping at Refugio Gray and our first experience in a refugio– one to forever be remembered, this was our favorite refugio along the W trek! Camping was great here, tons of tree cover and great layout!


Day 2: Glacier Gray (Back) to Paine Grande

Start Time & Distance: Day 2 only required us to head back the way we came (going back down the left side leg of the W) to Paine Grande, which was where we started and had lunch in Day 1. So we knew the 7 miles would only take us about 4-5 hours. We saved the Glacier Gray lookout for this morning, which is only ½ a mile from the campsite and refugio. We enjoyed a slower paced morning and headed out on the trail around 11am.
Terrain & Weather: The wind on Day 2 was intense, specifically in those high elevation, exposed areas of the trail, and physically moved us several times. Having poles is a must (in my opinion) as these were a huge support system to stabilize and brace for impact! There was one vertical incline ascent (downhill on day 1) right at the beginning that required some focus and diligence with managing load (if carrying a heavy pack).
Refugio/Camp Recap: Night 2 we camped at Paine Grande, which we would NOT recommend! This was one of the toughest nights due to the harsh weather coming in, tons of wind and heavy rain and this campsite was not well equipped for the weather, which really surprised us! The campsite area was completely exposed with no tree cover and only those tents closest to the mountain had the best set up, which we did, and the night was still challenging. Nick woke up in the middle of the night actually wet with his sleeping pad and bag covered in water from the ground below! Our tent was very shaky all throughout the night due to the heavy winds and we even met other hikers that had their tent break due to the heavy winds and lack of tree cover at this campsite. Highly recommend booking a night in the refugio or skipping this campsite if at all possible!


Day 3: Into the Trenches of Patagonia to Campsite Frances

Start Time & Distance: Day 3 felt like the real start to all you hear about Patagonia: the ruthless, unpredictable weather and all types of terrain. Day 3 and on made Days 1 and 2 feel like warm ups! From here on out, wake up calls were around 8am and hiking by 10am after getting packed & fueled up. This was the first day we truly had our work cut out for us with nearly 10miles in unforgivable weather.
Terrain & Weather: Let me start by saying, the weather from the night before only got worse this day. We, along with several other hikers, attempted to wait out and hope for a shift or even just a gap in the rain/hail/sleet, whatever you want to call it, maybe all 3, to make a run for it, but it never let up. Due to the harsh weather conditions today, we were trekking through mud, puddles and a lot of loose dirt. Over several bridges and through the French Valley, we made our way to Campsite Frances earlier than expected, just before 2pm.
By then, the weather started to clear up and we couldn’t check in for another 2 hours. So we opted to drop our packs at the campsite and hike about 45 mins (each way) to Refugio Cuernos. This added about an extra 3ish miles to our day, something you could forgo if you are staying at Campsite Frances as this was going in the same direction we would be heading the following day. Since we had the time, we figured why not! We had an early pizza dinner at Curernos, enjoyed hot and cold beverages and had an incredible view right along the water! The morning of Day 3 was the roughest of the trail, though having it clear up by 2pm, turned out for a great evening!
Camp Recap: We hiked (pack-less) back to Campsite Frances, which was a paid, superior campsite where all of the tents are “treehouses” and pre-set for you! So all we had to do was drop our packs, unload and enjoy our treehouse for the night! This was one of the coolest experiences we’ve ever had!


Day 4: Into the French Valley & the Never Ending Trek to Refugio Chileno

Start Time & Distance: Due to the weather on Day 3, we were not able to get into the French Valley and the lookout points along the way (this was the center leg of the W). I opted to do this additional 4 miles in the morning while Nick hung back at Campsite Frances (he was in the bar, with WIFI and doing just fine, lol). Not mentioned prior, Nick was doing this entire hike with an ingrown toenail + a toe infection, so the additional miles wasn’t something he was going to opt for!
I on the other hand, all good toes, was not going to leave Patagonia without doing the full W! While I definitely do not regret it, this made Day 4 one of the hardest hikes I’ve ever experienced, clocking it at just about 15 miles in one day for me and around 10 for Nick. Weather permitting, I would recommend doing the French Valley on Day 3 if going this same route as these extra miles made Day 4 gruesome!
Terrain & Weather: Day 4 was an absolute blue bird day, so I knew I had to do the extra trek up into the French Valley. I was able to keep my pack with Nick, which allowed me to go way faster and I was up and back in 2 hours, including about 30 minutes for pics and videos at the top! Despite this being the hardest day, mostly due to the long distance and steep inclines at the very end getting into Refugio Chileno (I’ve never been more excited to see a cabin in my entire life), the terrain and weather were incredible. We had a little bit of undried mud and puddles, though a majority of the trail tried up overnight, which was a blessing for us!
The terrain on this leg of the tip was ever changing. Starting with firm mountain rock, then navigating through rolling hills of loose, slick rock, progressing to an open valley of lush grass and firm dirt, and ending with scaling 3 of the most gnarly inclines along the trip made up of pure loose rock and pebbles. This was by far, the most challenging days for both of us: Nick with his toe infection, me with my additional 4 miles that were very quickly catching up to me, and both of us with tired legs heading into the back half of our trek!
Refugio/Camp Recap: We finally arrived at Refugio Chileno around 7pm after a full day of hiking and couldn’t have been happier to not have to set up camp! We enjoyed our whole food ingredient beef stroganoff backpacker meal, ice cold beers and a snickers bar at night as our legs slowly turned to cement! We stayed in another one of those tent treehouses and ours was right on the river, making for a peaceful night's sleep before the grand finale of Torres del Paine the next morning!


Day 5: The Grand Finale—Torres del Paine
Start Time & Distance: This was our final day, and I think the one we were most excited for throughout the trek– the iconic Torres del Paine (not to be confused with the name of the national park too)! We got started around 10am, though it is common for hikers to wake up super early and do this hike for sunrise; we wanted our sleep lol! Since we were already at the halfway point on the right side of the W, today we were going up to the top & all the way back out, totalling about 10 miles from start to finish.
From refugio Chileno, to the top was about 2 hours and down about an hour and half, with about 45 mins at Torres de Paine, totalling just under 5 hours for the round trip from Refugio Chileno. The best part about this leg of the trail was that since it was a round trip effort, we were able to leave our backpacks at the refugio and only carry our water and protein bars up to the top– this made a world of a difference; I couldn’t imagine if we had to do that with our packs on! We then had about a 3ish hour descent back down to the welcome center, where we concluded the hike and got a bus to the national park entrance.
Terrain & Weather: We lucked out with another stunning blue bird day and the first hour along the trail to Torres del Paine was quite fun and very smooth! Fully covered in the trees going though the mountain, over some bridges and up some forest stairs, the path leading up to the beginning ascent to the monument was a breeze.
The ascent is NOT easy. For an avid backpacker, this will be a good challenge and for those who have never hiked before, this will feel extremely hard, though it is doable. We saw people of all ages from toddlers with their parents to a 90 year old woman with her kids and grandkids. So, it is doable and your timing may look different based on your level of experience! The view at the top is worth every drop of sweat! We decided that one of these may just have to be our 2025 Christmas card!


Post Patagonia Recommendations
The feeling of making it to the very end of this 5 day excursion & powering through the hardest 2 days at the end, is truly priceless. It’s like conquering something that 1) you didn’t imagine in your wildest dreams you’d have the opportunity to and 2) something so challenging where your mind literally has to take over to power you through because your body is so close to throwing in the towel. This trail was not only a physical challenge, but also a mental one. I don’t think I have ever been that excited to sit in a chair and chug ice cold water than ever before. I was exhausted, grateful for my able body & in disbelief that we had just hiked one of the most beautiful, challenging mountain regions in the entire world. It was nothing less than surreal.
Who Is the W Trek Perfect For?
As mentioned several times, this trek can and has been done by all ages! The W trek is so unique because each right and left legs of the trail can be done as single day or two day, 1 night hikes, making the W trail and all its beauty accessible to those beyond traditional backpackers. In addition, with all the accommodations from lodging to food to full service guides, you can do this trail anyway you want– carrying everything and camping to carrying nothing but the clothes on your back, having your meals cooked for you and sleeping in a cozy lodge with a fire and an actual mattress. Did I mention the hot showers at every refugio? Wild. To your traditional backpacker, like me, the accommodations along the trail were mind blowing; I had never seen anything like it in the mountains before.

Along the way we saw a ton of other couples, solo hikers and even larger groups of families and friends (again all ages) doing this trail together over a series of days. Inside the park there are even accommodations such as very nice hotels that you can use as a base point for day hikes. There are so many possibilities, you have to just find the plan and path that works best for you and your group!
So I would hands down recommend to anyone interested in hiking the W (or the O) in Patagonia to do the following:
Read my Part 3 (coming soon) of my Guide to hiking Patagonia, Chile for all the planning details and how to make this trip possible!
Train accordingly & use my Part 1 "My 6 Week Training Plan for Backpacking Patagonia" where I provide you with a full program you can follow to train for this trail and others
Don’t second guess yourself– if you’re thinking about it, you’ll do that forever! This is a once in a lifetime opportunity that you will only regret not doing!
What To and Not To Bring
Essentials:
Layers– this trail is not forgiving when it comes to weather and layering up is a must. You’ll want to have a base layer, such as a thermal, a rain repellent/water resistant, lightweight jacket, a warm sweater for evenings, a puffy, warmer jacket for heavy wind days and a beanie is an absolute must! For the lower body, you’ll need ideally water resistant hiking pants, sleeping pants (leggings or long johns) and 2 pairs of socks (one for hiking and one for sleeping).
First aid & blister care– this is never something you want to skimp out on when going on any backpacking trip, especially with the varying weather in the Patagonia region.
Snacks – maybe this is just me, but hiker hunger is a very real thing! Having some easy access nut mixes, protein bars, dried fruit (I love pineapple and mangos) are the GOAT when you’re getting hungry during a long hike day.
Hiking poles – these made all the difference on this trail. You can rent them in Puerto Natales before going on the trail so you don’t have to travel with them. Don’t skimp out on this, your knees will thank you!
Unnecessaries:
Water filter– the water is some of the best you will ever have and directly from the source, whether that be along the trail or at the refugios. There are ample places to get clean, fresh, ice cold water. Bringing a filter or a pump on this trail is only going to be wasted space and extra weight!
Food – if you’re planning to purchase meals at the refugios or book your trip with a guide who is cooking for you, you won’t need to worry about packing meals with you!
Tent & sleeping gear – if you plan to book your lodging for premium campsites (as we did for nights 3 and 4) or in the refugios where beds are available, then you may not need to worry about bringing a tent or sleeping gear as just about everything can be rented!
Ready to Take on Patagonia?
I hope this has given you a brief insight into my personal W trek journey, without giving too much away, and has you excited for either this exact trail or others that may come sooner! I can’t recommend this trail enough to anyone interested. Never have I nor do I think I’ll ever experience this type of trail anywhere else in the world!
Stay tuned for Part 3 of my Patagonia guide, where I’ll be breaking down all the steps to take to build your Patagonia itinerary and all the planning that goes in behind the scenes!
Comment below with any questions or anyway I can help support your hiking journey!


